

A dishwasher can look perfectly level, run through its first cycle, and still cause problems weeks later. A slow leak beneath the cabinet, a drain hose installed too low, or a loose electrical connection can turn a new appliance into an expensive kitchen repair. The best dishwasher installation practices focus on the details behind the machine – the connections, clearances, support, and testing that keep it working safely day after day.
For homeowners, renters, and landlords, professional installation is often the simplest way to avoid repeat calls and water damage. It is especially worthwhile when replacing an older unit, changing cabinet flooring, moving plumbing, or installing a hardwired dishwasher.
Start With the Space, Not the Appliance
A standard built-in dishwasher is commonly designed for a 24-inch-wide opening, but the cutout must be checked rather than assumed. Measure the width, height, and depth of the cabinet opening, then confirm the new dishwasher’s specifications. Flooring changes can be a hidden issue: tile, vinyl, or hardwood installed after the previous dishwasher may reduce the opening height and make future removal difficult.
The opening also needs practical clearance. The door should open without striking an island, wall, or nearby drawer. The appliance must sit close enough to the sink cabinet for the water supply, drain hose, and power connection to reach without stretching, kinking, or being crushed when the dishwasher is pushed into place.
Before installation, inspect the cabinet floor and surrounding area for old moisture damage. Soft particleboard, dark staining, or a musty smell may point to a previous leak. Installing a new dishwasher over damaged material can conceal a problem until it becomes worse. Address the source of any leak first, whether it came from the old appliance, the sink drain, or a water line.
Prepare the Water, Drain, and Electrical Connections
The connections under the sink deserve as much attention as the dishwasher itself. Shut off the hot-water supply at the local valve and confirm that the valve operates properly. Older shutoff valves can seep or fail to close completely, and replacing one before installation is far easier than discovering the issue during a test cycle.
A dishwasher requires a hot-water supply connection rated for the application. The supply line should be routed neatly through the cabinet opening with no sharp bends. A bent or pinched line may restrict water flow, while an overtightened fitting can damage threads or seals. Connections should be secure, but forcing them tighter is not a substitute for the correct fitting and washer.
Drainage is just as critical. The drain hose must be installed according to the dishwasher manufacturer’s instructions and applicable local plumbing requirements. In many installations, this means securing a high loop beneath the countertop or using an air gap where required. This routing helps reduce the risk of dirty sink water flowing back into the dishwasher.
If the dishwasher connects to a garbage disposer, make sure the disposer’s dishwasher inlet plug has been removed. Forgetting this small step causes an immediate drain failure, often mistaken for a defective new appliance. The hose should also be cut only to the approved length if trimming is permitted. Excessively long hose runs can hold water and make draining less reliable.
Electrical work should never be improvised. Some dishwashers use a power cord connected to a receptacle in the adjacent cabinet, while others are hardwired. The circuit, wiring method, and protection requirements must suit the appliance and local electrical rules. Never run a dishwasher from an extension cord or place a plug where it cannot be safely accessed. If the existing electrical setup is questionable, have a qualified technician or electrician assess it before the dishwasher is installed.
Best Dishwasher Installation Practices for Positioning
Once the utility connections are ready, the dishwasher should be moved into place carefully. Keep the hoses and power connection visible and controlled as the unit slides back. This is where many otherwise good installations go wrong: a drain hose gets trapped behind the machine, a water line rubs against a sharp cabinet edge, or wiring is compressed against the back panel.
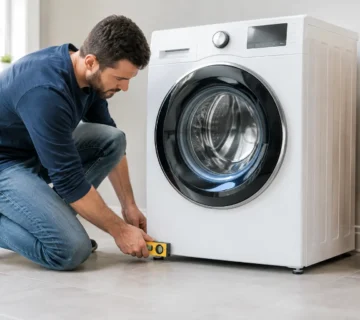
The dishwasher must sit level from side to side and stable from front to back. Use the adjustable feet to correct the position rather than shimming the appliance with loose wood, cardboard, or other temporary materials. A unit that leans can affect door operation, rack movement, wash performance, and how water drains at the end of a cycle.
Do not rely on the countertop to hold the dishwasher in place. The unit should be secured using the manufacturer-approved mounting method, often to the cabinet sides or underside of the counter. The correct approach depends on the counter material. Drilling into stone or quartz without an approved mounting solution can cause costly damage, while an unsecured dishwasher may tip forward when a loaded lower rack is pulled out.
Check the door before final fastening. It should open and close freely, stay balanced, and clear adjacent cabinetry. The toe kick should be installed after testing so the connections remain accessible while any adjustments are made.
Test for Leaks and Drainage Before Calling It Done
A dishwasher installation is not complete when the machine turns on. It is complete after a full connection check and a test cycle. Start by opening the water supply slowly and inspecting every fitting under the sink and at the dishwasher connection. Even a small bead of water at a fitting needs attention before the appliance runs.
Run a short cycle or the manufacturer’s recommended initial test. Watch for water at the front corners, underneath the unit, and inside the sink cabinet. Listen during the fill and drain portions of the cycle. A loud drain sound, water backing up into the sink, or standing water inside the tub can signal a hose-routing issue, a blocked plumbing connection, or a closed or obstructed valve.
After the cycle drains, inspect again with a dry paper towel around connections and on the cabinet floor. A slow drip can be easy to miss by eye but can be found quickly with a dry surface. It is also worth checking that the dishwasher door gasket is clean and properly seated, especially on a unit that has been stored or transported.
Common Shortcuts That Create Bigger Problems
The most costly dishwasher problems often begin with a shortcut that seemed harmless. Reusing a worn supply line, skipping the high loop, forcing a dishwasher into a tight opening, or neglecting to level the unit can lead to poor performance and avoidable service calls.
Another common mistake is assuming every new dishwasher can replace the old one without changes. Newer models may have different hose locations, electrical connection requirements, insulation, or door-depth clearances. A replacement installation should be treated as its own job, not simply a swap.
It also depends on the condition of your kitchen infrastructure. A straightforward replacement with sound plumbing and a proper electrical connection may be quick. A home with corroded valves, damaged cabinetry, outdated wiring, or a difficult stone-counter mounting situation needs more planning. An honest assessment at the start helps prevent surprise costs later.
When Professional Installation Makes Sense
Professional help is a practical choice when there is any uncertainty around plumbing, electrical connections, mounting, or drainage. It can also save time when a household needs its kitchen back in service quickly. A trained installer can identify issues that are not obvious from the front of the appliance, test the system properly, and explain what was done before leaving your home.
For households in Kitchener, Waterloo, Cambridge, and nearby communities, IAS Repair & Parts provides dishwasher installation with clear communication, careful in-home work, and attention to the connections that matter after the installer leaves. Keep the installation paperwork, note the model and serial number, and check beneath the sink once or twice during the first week of use. That small habit can catch a minor issue early, before it has a chance to affect your cabinets or flooring.



No comment